

How To Draw Horse Step By Step
Kajestic, strong, and elegant, horses are one of the animals virtually loved by humans. With their strong legs and long flowing manes, it is not hard to see why horses are a favorite subject for many artists. Despite their popularity, many artists struggle with the cartoon of a horse. It tin be catchy to go the proportions correct, and horses have very specific features which make it clear when you practice non quite become it right. If y'all desire to know how to draw a horse, we have created an like shooting fish in a barrel-to-follow tutorial. If y'all want to conquer this magnificent beast, gather your drawing supplies and read on.
Table of Content
- 1 Horses and Humans
- ii How to Draw a Horse Step-past-Footstep
- two.one Step ane: Constructing the Equus caballus'due south Main Body
- 2.ii Stride ii: Constructing the Horse'due south Head
- ii.iii Stride 3: Constructing the Horse's Muzzle
- ii.4 Footstep iv: Constructing the Horse's Neck
- 2.5 Pace 5: Constructing the Horse'due south Ears
- two.half-dozen Step half-dozen: Constructing the Equus caballus's Tail
- 2.7 Step 7: Constructing the Horse's Get-go Front end Leg
- 2.8 Step 8: Constructing the Equus caballus's Second Front Leg
- 2.nine Footstep 9: Amalgam the Equus caballus'southward Offset Back Leg
- 2.10 Footstep 10: Constructing the Horse's Last Leg
- 2.11 Pace eleven: Fine Lining the Horse's Outline
- 2.12 Stride 12: Cartoon the Tail and Main Blowing in the Wind
- 2.13 Step 13: Adding Details to the Equus caballus's Legs
- 2.14 Footstep 13: Adding Texture and Details to Your Horse
- two.15 Step xiv: Finishing Your Easy Equus caballus Cartoon
- 3 Frequently Asked Questions
- 3.1 Does this Tutorial Brand Horse Legs Drawing Simple?
- 3.two How Long Does It Take to Create a Drawing of a Equus caballus?
Horses and Humans
Since 3500BC, horses and humans have had a long and fruitful working relationship. From pulling carts and plows to carrying humans on their backs, horses are strong and undecayed creatures. Horses have very muscular bodies that shift and change as they are in motion. To be able to practise this elegant and beautiful beast justice, we need to be able to capture this move throughout their bodies. Horses too have very long legs with many curves and joints that seem much harder to draw than they actually are.
In this how to draw a horse step-by-step tutorial, we will atomic number 82 you lot through all the steps to help you nail the right perspective and capture this stunning horse in all of its glory.
How to Draw a Horse Footstep-by-Pace
Our resident artist has created this tutorial using pencil on paper, but you are more than welcome to follow along in your called medium. Whether you are a graphic artist who uses adrawing tablet, or your favorite medium is watercolor, you can adapt this easy horse cartoon tutorial. If you are set to tackle the intricacies of drawing a horse, gather your supplies, and let us go started!
Step one: Constructing the Horse'southward Main Body
For all of ourbeast drawing tutorials, nosotros always begin by using construction shapes and lines. Construction lines are simple and easy-to-depict shapes that aid the states construct the basic shape of our animal before we begin adding complicated details. Construction lines are used by professional and beginner artists alike, and they are sometimes referred to equally an creative person's best-kept secret.
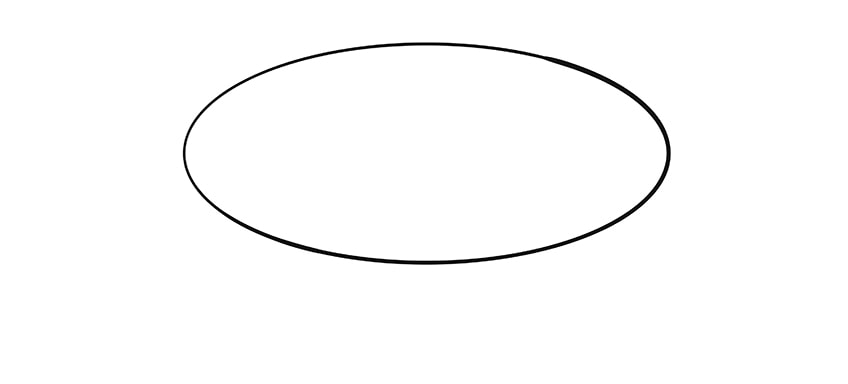
To brainstorm our drawing of a horse, we are going to use a long, horizontal oval to represent the horse'due south chief body. This first step is deceivingly simple because while information technology is just an oval, you need to make certain that it is placed perfectly on your page.
All around this oval, you volition be calculation other limbs and details, so yous need to brand certain that there is plenty of space so that your horse does non end up with a squashed neck.
Stride ii: Constructing the Horse's Head
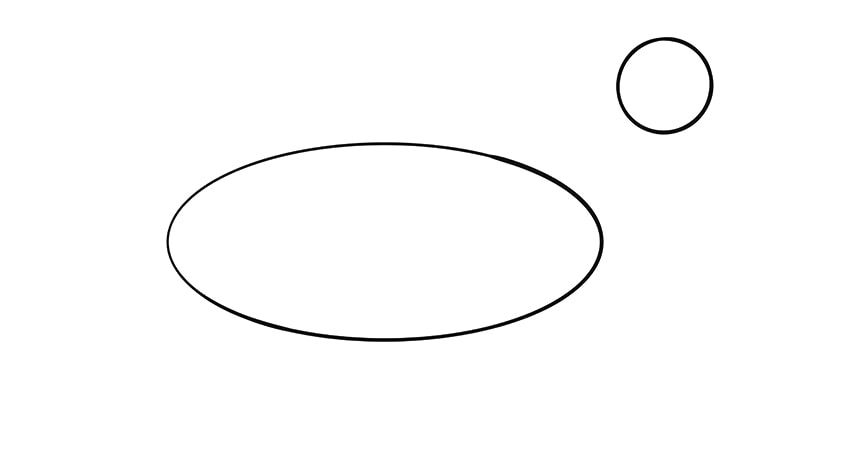
The second step in this piece of cake equus caballus cartoon tutorial is also a elementary construction step, but it is essential. In this stride, you are going to use a small circle to stand for the head in your drawing of a horse. To the right and above the main body construction oval, depict a small circle. You want the circle to be just above, and just in front end of the primary oval.
At this phase, it does await foreign for your horse's head to be hanging and so far abroad from the body. In the adjacent few steps, you will draw the horse's neckline to bring together the two body parts together.
Pace three: Constructing the Horse's Muzzle
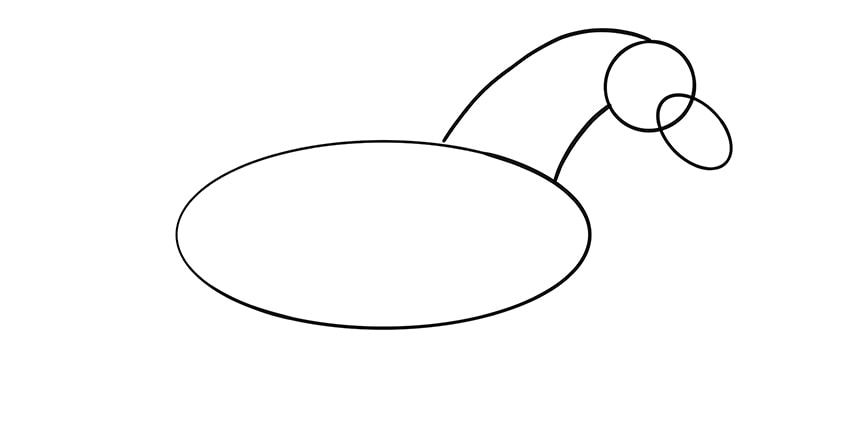
Before yous bring together the head to the body, you lot need to quickly construct the muzzle of the equus caballus. For the muzzle, you are going to use an oval shape that slopes at a 45-caste angle downwards towards the bottom correct corner of your folio. The top of this oval should overlap quite a lot with the head circle.
In the side by side few steps, you will utilise this oval to help perfect the shape of the equus caballus's head and nose.

Footstep 4: Constructing the Horse's Neck
Finally, the time has come to join your horse's head with its body. Brainstorm with a curved line that starts at the very peak of the head construction circle and curves downwardly onto the top of the body oval. Yous want this line to join with the body oval simply before the halfway point. Use another, smaller curved line to end the neck, beginning only below the horizontal halfway bespeak in the head circle, and join this to the body. Y'all will use these lines to aid you complete the terminal outline of your horse's neck in subsequently steps.
At this point, you may begin to meet the shape of a horse poking through the construction lines.
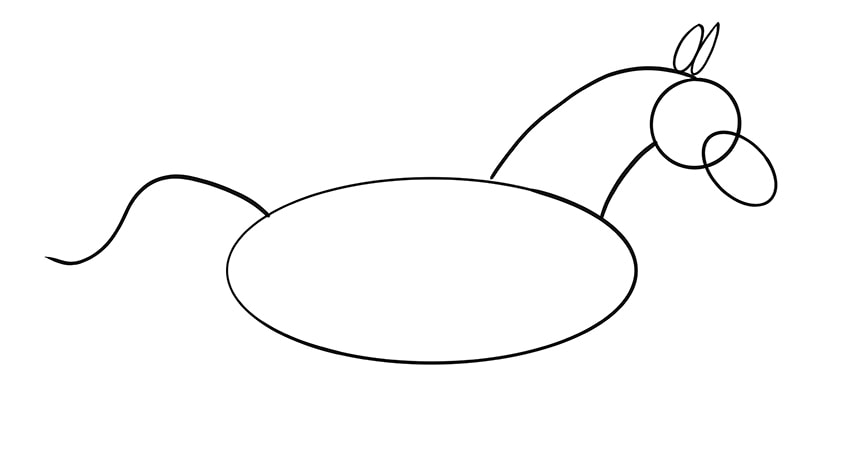
Step 5: Constructing the Equus caballus'southward Ears
Adding the horse'due south ears immediately transforms your structure drawing and helps y'all to see the equus caballus come to life. To construct the ears, you are going to use 2 slightly differently shaped ovals. Begin where the neckline joins the caput circle. At this point, describe a long and thin oval shape that comes to a point at the peak. This front ear should wait a niggling like a long petal. Just behind this first ear, draw another oval that is fatter and does non come up to every bit much of a indicate.
The difference in the ear shape is the result of the perspective we are using for this cartoon of a horse.

Step 6: Constructing the Horse'due south Tail
For all the steps then far, you have used shapes to correspond the unlike parts of the equus caballus's trunk. In this pace, yous are going to employ a freehand curved line to create the full general shape for the horse'south tail. The horse that nosotros are drawing is on the motion, and so the tail is going to be flowing backward.
Information technology may take a couple of tries until you are happy with the shape of your tail, only be patient, these things have time.
Stride 7: Constructing the Horse's Starting time Forepart Leg
We take broken down the horse legs drawing steps into a few parts considering they are arguably the about tricky part of the equus caballus drawing to nail. In this offset horse legs drawing step, we are going to tackle the front back leg. Brainstorm by cartoon 2 small circles almost a centimeter apart from each other. These two circles represent the two joints in the forepart leg.
The height circle should be in line with the head circle and should be the same distance away from the torso every bit the head is.
Attach these circles to the main torso oval with ii lines that are as wide as the circles. You desire to make sure that these lines are not two solid lines all the way downwards the leg. Instead, you lot want the lines to separate in betwixt the circles. At the lesser of the bottom circle, draw a small curved triangular shape. This triangle will be the outline for your horse's hoof.
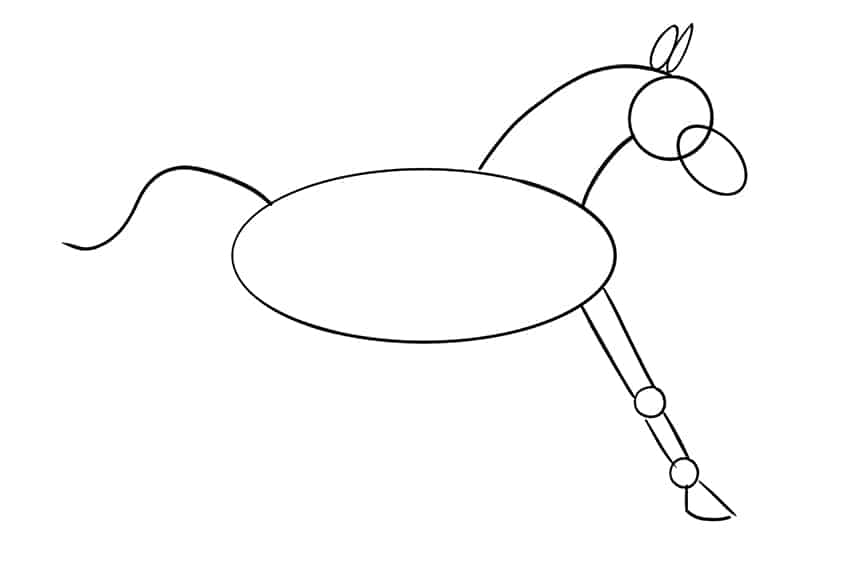
Step viii: Amalgam the Equus caballus'due south 2nd Front Leg
In this step, y'all are going to use the same process to construct the second front leg. This front leg is the ane closest to u.s.a., and information technology is bent as the horse is in motion. Over again, you want to draw two circles to correspond the joints, but these circles demand to be in slightly different places.
If you use the two circles for the first front end leg as guidelines, you want the elevation circle for this second leg to exist behind them but in the middle of them.
And so, y'all can draw the 2nd circle only below this first one and about a centimeter backside information technology. Use ii lines to join these circles to the main torso and each other. Because this front leg is closest to use, y'all tin make the leg a little wider at the top where it joins the body oval. The terminal part of this stride involves drawing a tear-drib shape around the bottom circle. This round tear-drop shape volition correspond the hoof for this leg.
Footstep ix: Constructing the Equus caballus'southward Commencement Back Leg
Y'all know the drill past now. In this step, you demand to construct the dorsum leg that is closest to y'all. The two joint circles need to be straight in line with the two in the very front end leg. You also want to make sure that the bottom circle is in forepart of the tiptop one. Because this back leg is the ane closest to us, you desire the meridian of the leg to be quite wide.
Cease this step by drawing another slightly curved triangle extending from the bottom circle.
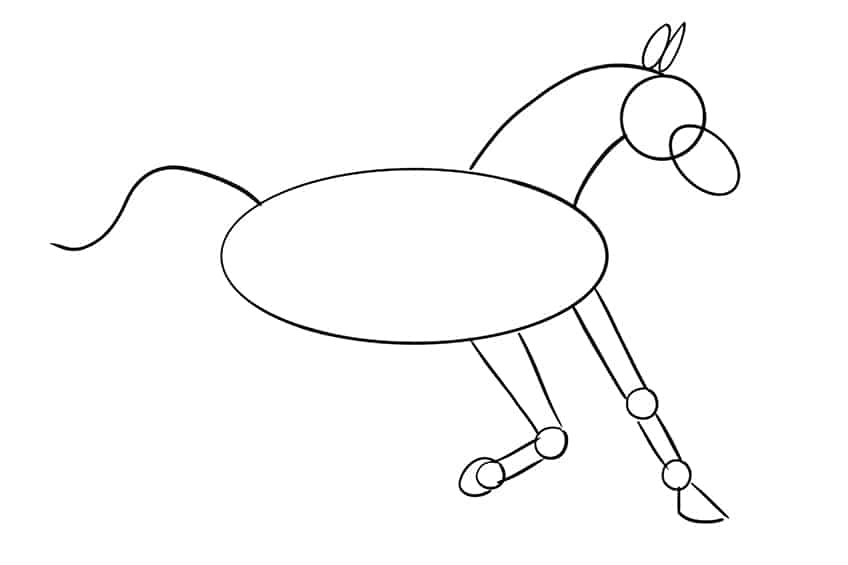
Step 10: Constructing the Horse'southward Final Leg
This step is the terminal horse leg drawing step. Begin over again with your 2 joint circles, placing these higher than the others. Then, draw the lines that will be visible from our perspective, joining them behind the back leg you just drew. Finish this leg with the curved triangle for the concluding hoof.
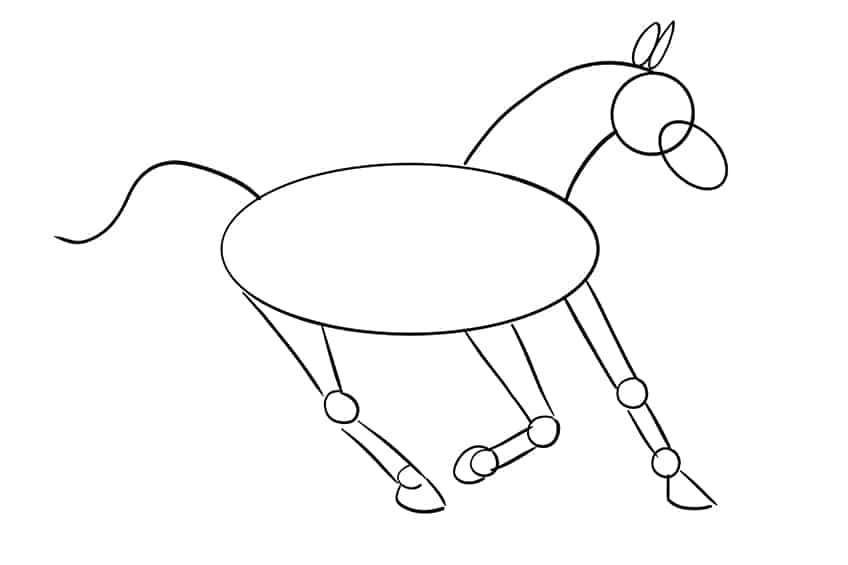
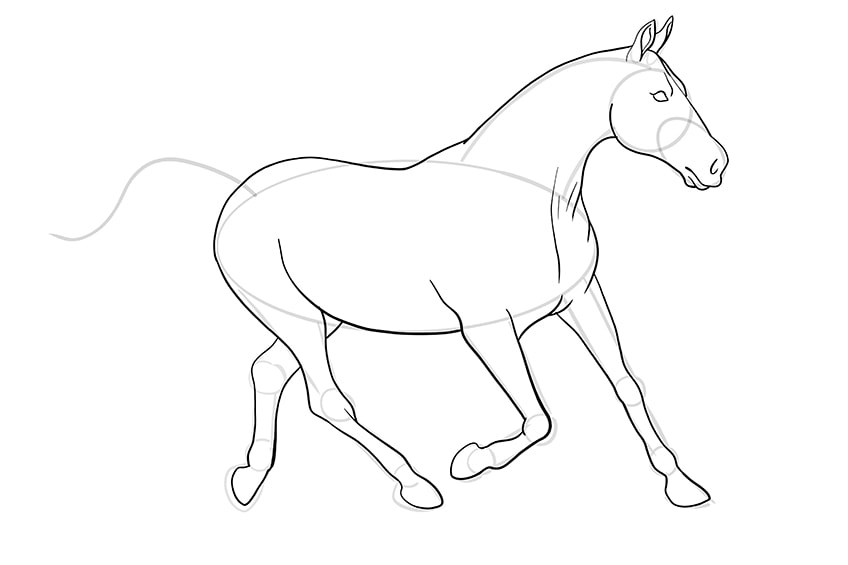
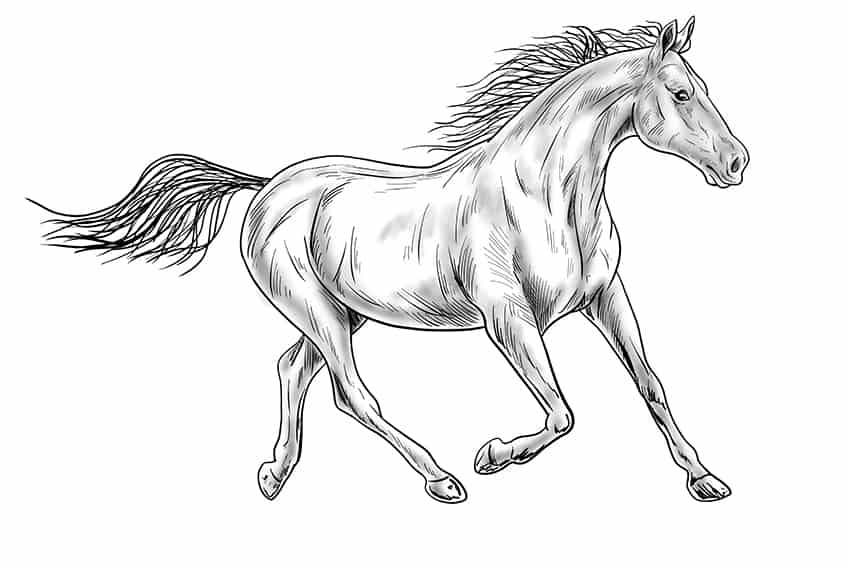
Step eleven: Fine Lining the Horse's Outline
At this stage of our like shooting fish in a barrel horse drawing tutorial, you have done almost of the heavy lifting work. Now, it is time to utilize a single fine-line outline to create the final shape of your horse. Using all the construction lines you take drawn so far, yous are going to utilize a darker pencil to outline your horse. You tin can begin at any point, and gently add a few curves to your outline then that y'all are not following the construction lines as well closely.
When it comes to outlining the legs that are closest to us, yous demand to accept the line up into the belly of the horse to add some shape and perspective.
Effectually the joints in the legs, add a small bump in your outline. You can also add some additional streaks along the equus caballus's lower chest and cervix to make information technology look a little more muscular. On the head, follow the construction lines fairly closely, only practise not follow the dip between the circle and the muzzle oval. At the bottom of the olfactory organ, add the niggling curves that you can meet in our example, and add a nostril and eye to the confront. Outline the ears and add a few piddling curves inside them to add some depth and particular.
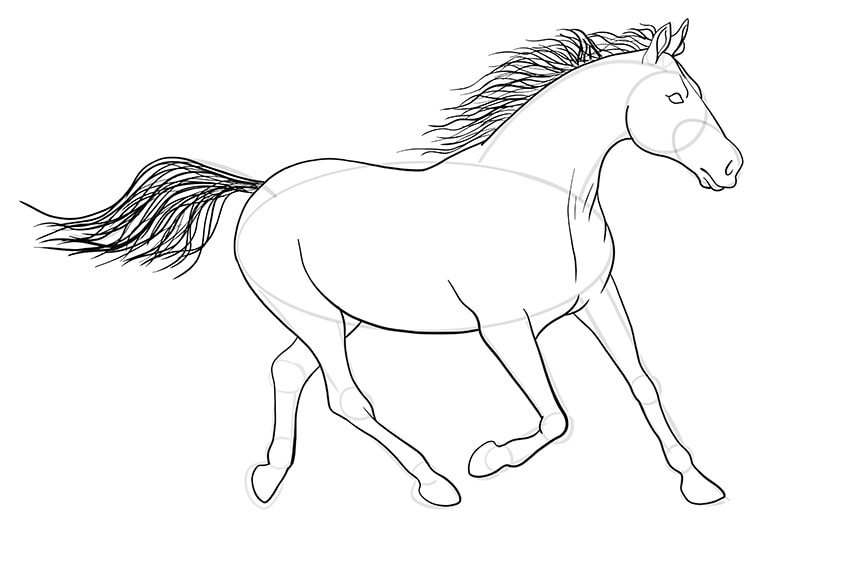
Step 12: Cartoon the Tail and Main Bravado in the Air current
Now that we have the general outline of your equus caballus, it is time to draw the mane and tail. The manner that we are going to describe these hair features will assistance give the impression of movement. Using a pen, or abrupt pencil, draw many curving hairlines that flow towards the dorsum of the horse. For the mane, begin around the ears, and first to draw a few small wavy lines in the right direction. Continue to move downward the back of the equus caballus's neck, making the hairs longer as you go further back.
For the tail, use the construction line as the guideline, and depict many flowing and overlapping hairs until you are happy with the fullness.
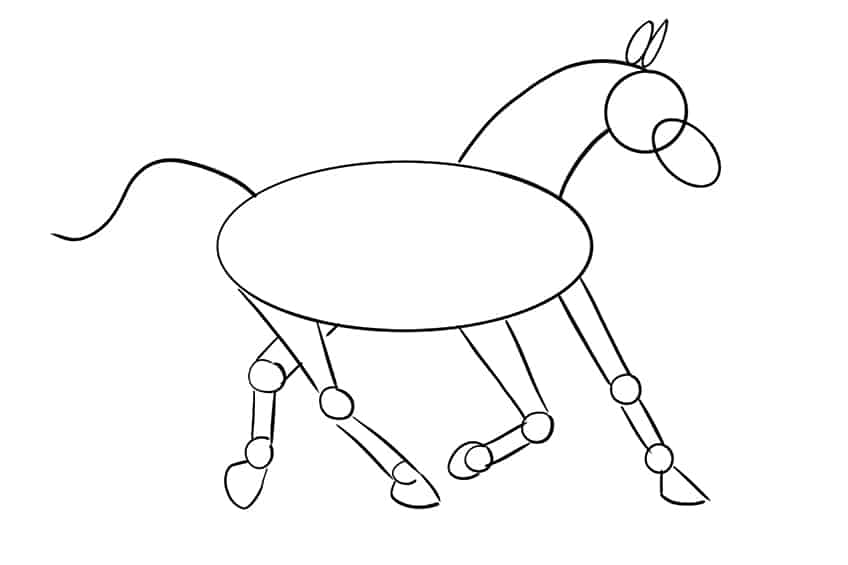
Stride 13: Adding Details to the Horse's Legs
In this step, you lot are simply going to add details to the legs of your equus caballus. Using the structure lines, add some curves around the joint circles, and add a few little lines in the areas of the legs that would be in shadow. You can also add together small piffling strokes all along the legs to requite the impression of hair in some places. Describe a line on the lesser of each foot to split the hoof from the leg, and add some small lines on the hooves to give the impression of a slight polish.
When you lot have completed this step, you can erase all the remaining construction lines.
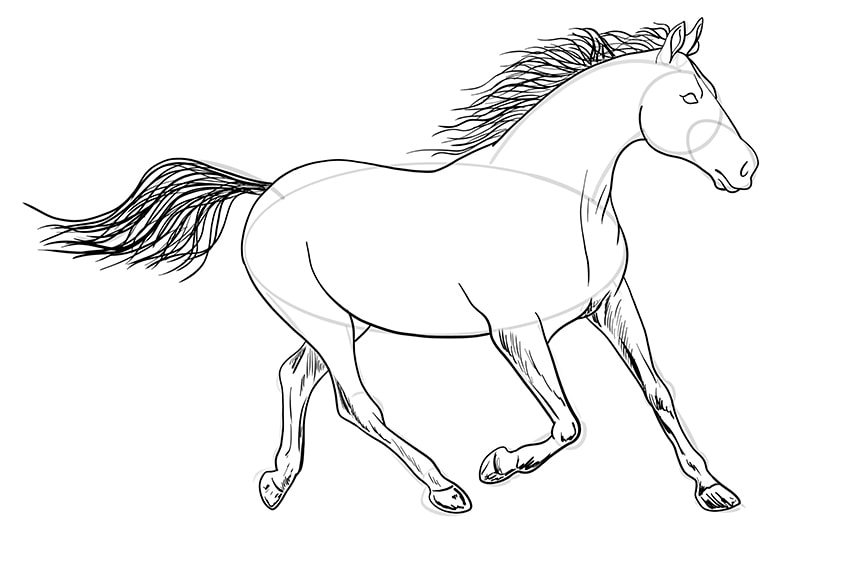
Step 13: Adding Texture and Details to Your Horse
Using the same technique every bit in the previous step, add cross shading lines throughout the torso and head of your horse. You want to follow the general shape of the horse, and draw these textural lines in this direction. To brand sure areas appear to take more than muscular definition, add more cross-hatching to assistance them stand up out. Add together more textural lines in the areas that yous would wait to be darker, such as around the optics, in the ears, under the head, under the legs, and on the horse'southward belly.
The amount of texture yous add is a personal preference. Sometimes, less is more, every bit as well much particular tin can go overwhelming and detract from the realism you are trying to achieve.
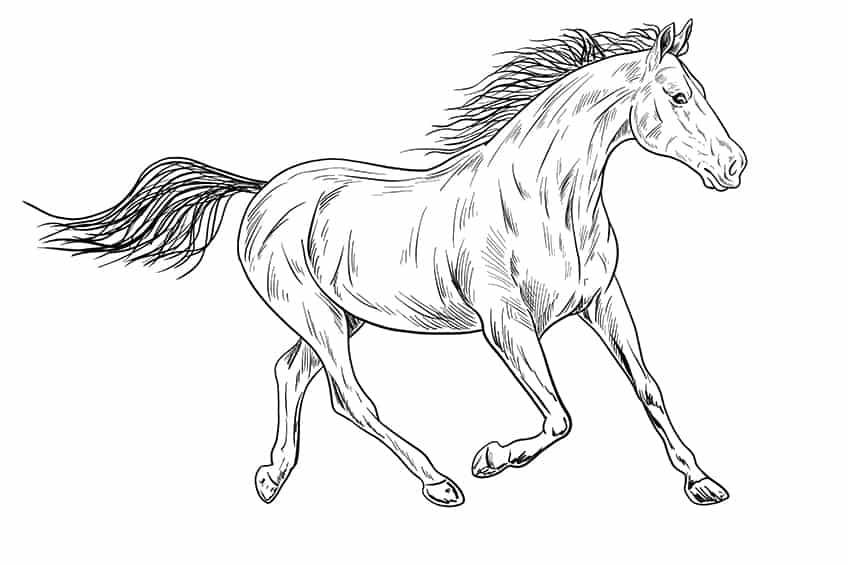
Step xiv: Finishing Your Easy Horse Drawing
In this final step of the drawing tutorial, you need to add some shading to add definition and make your drawing appear more realistic. Using a dark grey or black color, add some light shading effectually the areas where you lot added additional textural detail in the last step. This shading will help define the contours of the horse's trunk. Shade forth the horse'south belly, downward the insides of the legs, below the head, along the nose, and down the horse'southward chest.
When you lot are happy with your level of shading, y'all have officially completed your horse drawing! Well washed for having the patience to consummate this tricky cartoon tutorial. Hopefully you are feeling more than confident in your cartoon abilities, and nosotros really hope that you are happy with your drawing of a horse.
Ofttimes Asked Questions
Does this Tutorial Make Horse Legs Drawing Uncomplicated?
Of all the different parts of a horse's anatomy, drawing the legs is one of the most tricky steps. Horses take very long legs with different joints and curves that can accept some fourth dimension to primary. Luckily, if you are having trouble with horse legs drawing, our resident artist breaks downwardly the process into very easy steps that help yous practice and primary the fine art of drawing a horse.
How Long Does Information technology Take to Create a Drawing of a Horse?
Horses can be tricky animals to draw, and information technology may accept you some time to exercise and chief the dissimilar elements of the horse'due south torso. Do non be down-heartened if it does have a while for you to complete this tutorial, the longer you have to perfect something, the better ingrained the skill will be!

Source: https://artincontext.org/how-to-draw-a-horse/
Posted by: upchurchsucken.blogspot.com
0 Response to "How To Draw Horse Step By Step"
Post a Comment